In 2016, I gradually moved more and more towards making my own food at home. Though there were several reasons for this like the home cooked food tastes better, is more nutritious, is cheaper than store/restaurant cooked food but the main reason for me was that it is preservative free.
It all started with the bread. Every time I ate a piece of store-bought bread, I would get worried about the big dose of preservatives I was consuming. I read the ingredients on bread’s packaging and it had me very worried. All these chemicals -I wondered what impact they had on our family’s health.
I started to experiment with making bread at home. The homemade bread tasted better, was inexpensive and needless to say preservatives free. Moreover, I personally found kneading bread to be very relaxing. The smell of the bread baking in the oven is heavenly. But what I love even more than the smell of freshly baked bread is cutting it open while it’s hot, and slathering butter and jam all over a steaming piece of crusty, golden goodness.
I do acknowledge that cooking at home takes time and with many of us (women) now working; it is a challenging thing to manage. However, let me assure you that there are recipes which are easier to put together and make cooking a breeze.
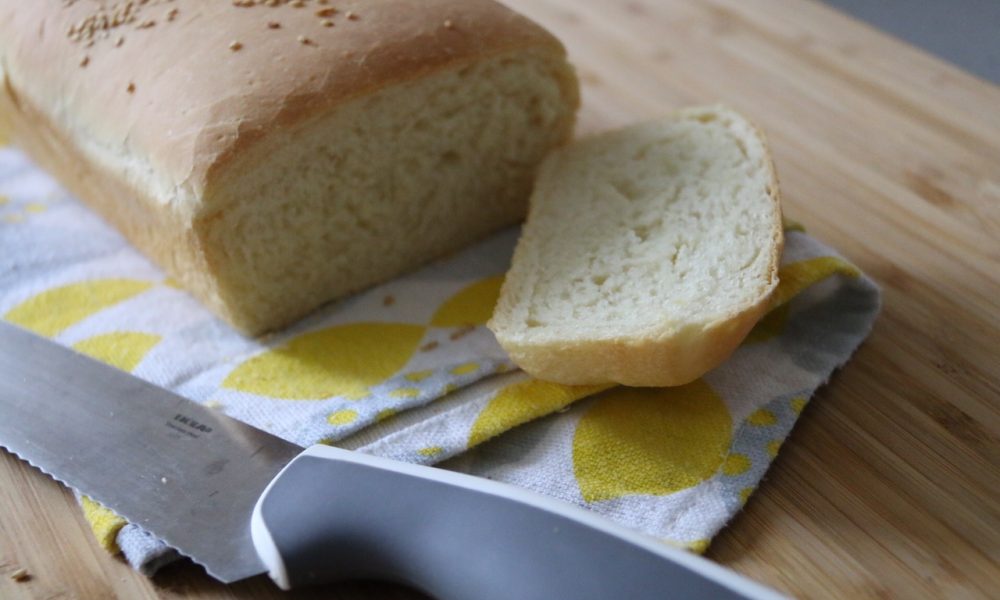
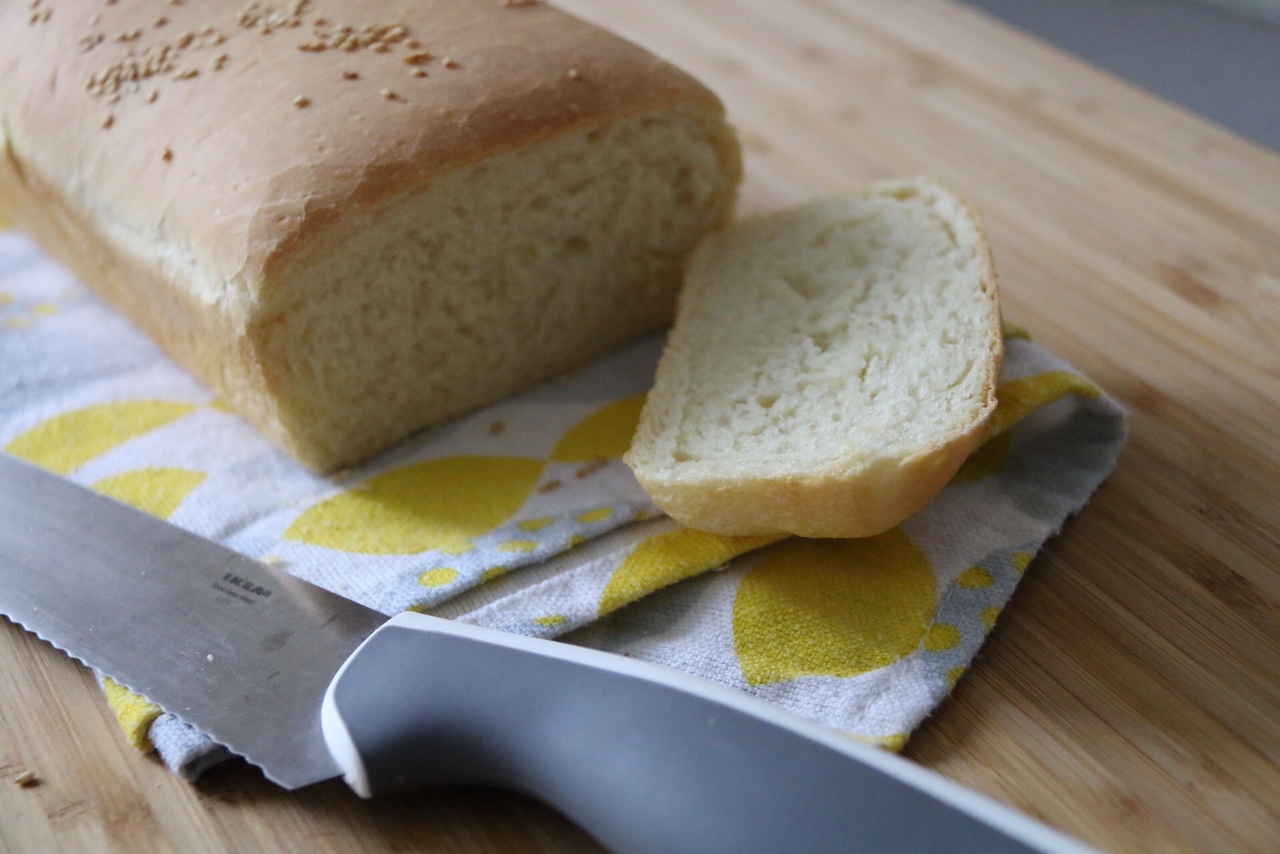
One such recipe that I share today is Milk and Honey Bread. This soft bread is my absolute favorite bread to make at home. The crust has the perfect, chewiness to it, and the inside is soft and delicate. It’s perfect for toast and sandwiches.
It only needs a few simple ingredients to make.. This recipe will make 2 loaves of bread. Use one and put the other in the freezer to use later. I slice the bread before freezing it, then all I need to do is pop the frozen bread in the toaster and it is ready. The bread stays fresh for up to 3 days outside and a month in the freezer.
I suggest that please read the notes at the end of the recipe carefully. These notes I have compiled based on my experience of baking bread over the last one year. If you’re making it for your children you may add 2 tablespoons of sugar to the recipe to make it sweeter. Alternatively, you may reduce the honey to 1 tablespoon (if so desired for less sweet bread).
Milk and Honey Bread
Makes 2 loaves
Ingredients:
- 2 teaspoons active dry yeast
- 1 ½ cups -2 cups lukewarm milk
- 3 tablespoons honey
- 1 tablespoon salt
- 3 tablespoons melted butter, or ghee/clarified butter, and some more for greasing bowl and pans and for brushing the tops of the loaves
- 5 cups all-purpose flour/ Maida
- 2 tablespoons of sesame seeds to sprinkle on top
Method:
Step 1:
Whisk together the yeast, honey and 1 1/2 cup warm milk (keep half cup milk for later use) until the yeast dissolves, then set aside for 15 minutes, until it starts to froth.
Step2:

In a big bowl add 4 cups of flour (keep 1 cup flour for use at a later stage), add salt. Mix together with a spoon to disperse the salt. Now make a well in its center. Add the melted butter or I personally like to use ghee. You may use olive oil or any vegetable oil that is readily available at home.
Step 3:
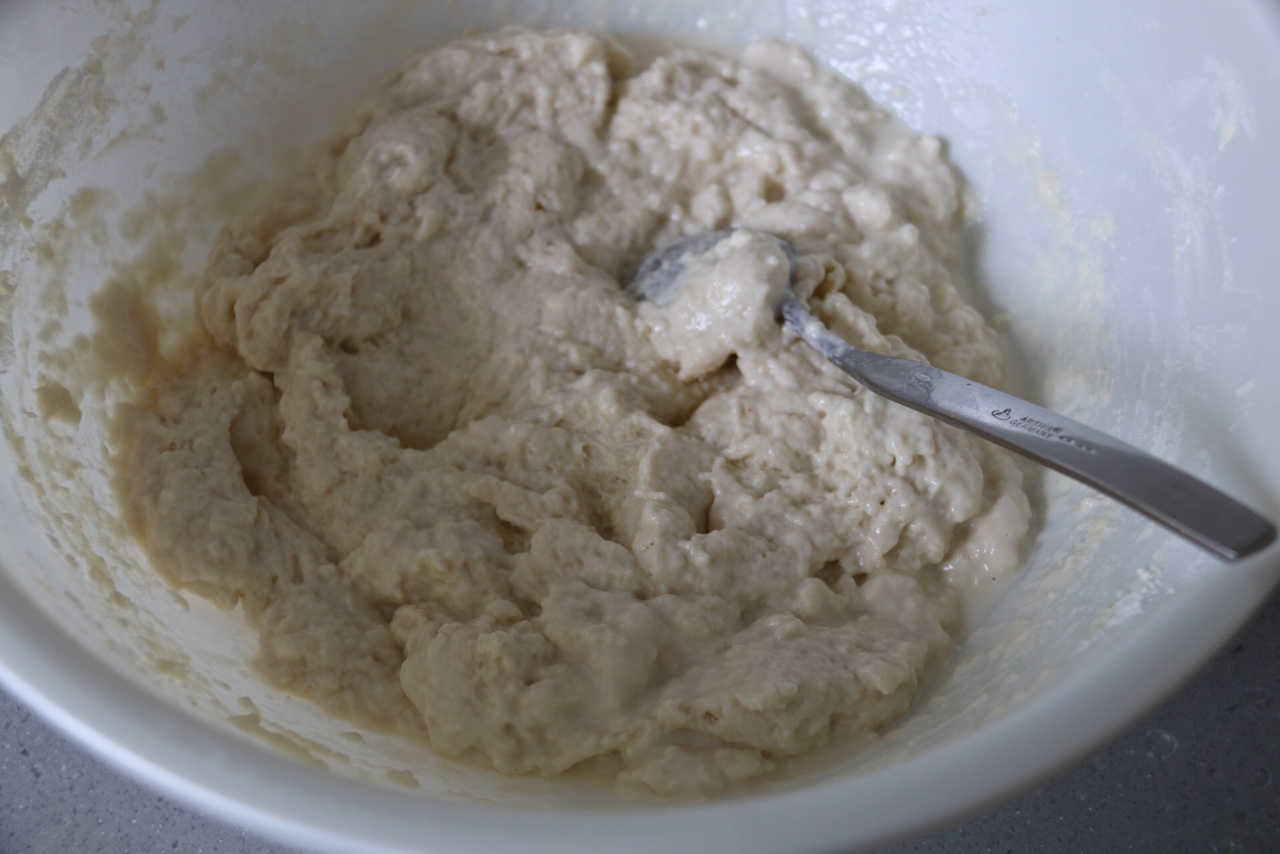
Pour the yeast mixture into the bowl with the flour. Using a spoon mix the liquid with the flour. The mixture should be sticky and wet. You may need to add 1/4 to 1/2 cup milk. Add the milk slowly, 1 tablespoon at a time.
Step 4:
Leave the mixture and set aside for 10-15 minutes. In my experience, this helps the flour absorb the liquid better. Hence it makes a softer dough. If you are doing it a night before you may want to cover and put this mixture in the fridge now.
Step 5:
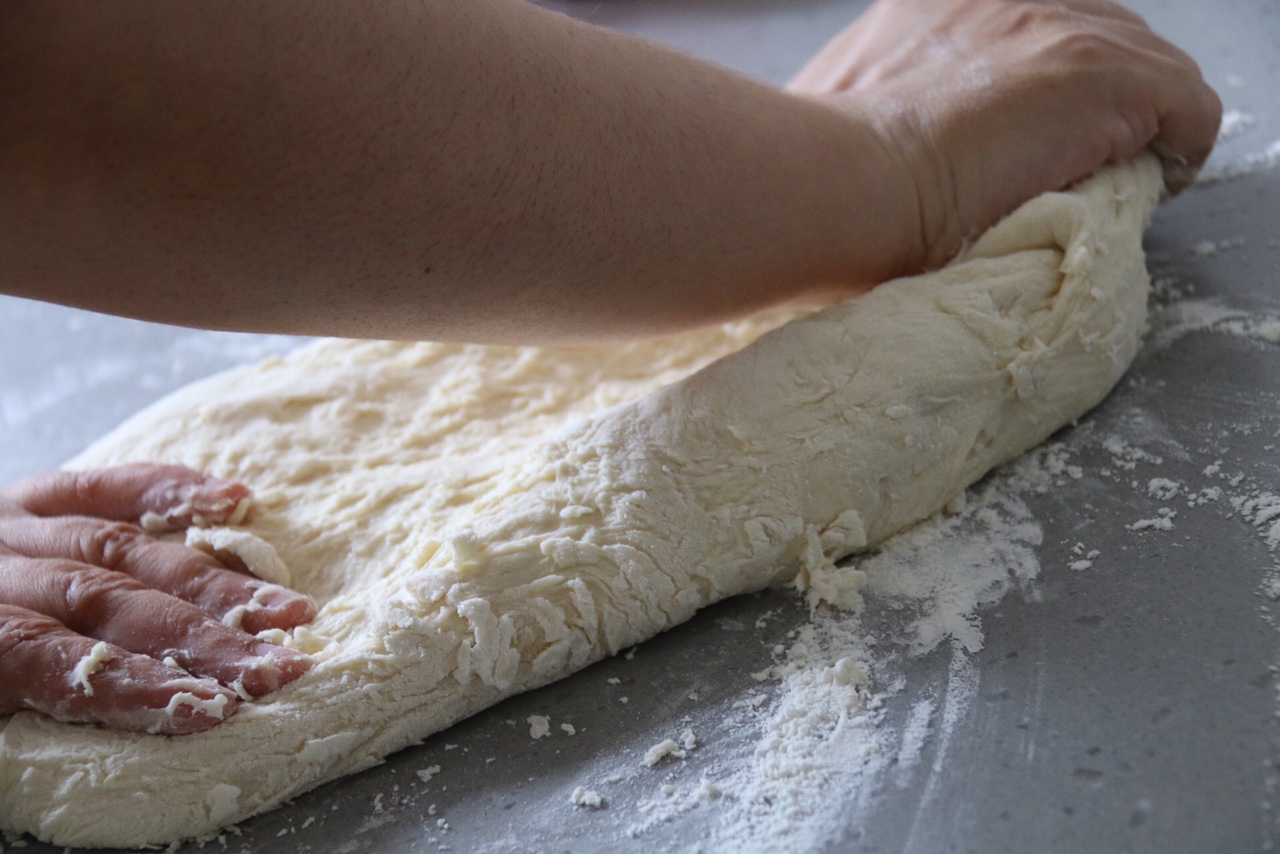
On a clean kitchen counter, using the 1 cup flour that was put aside earlier, dust the surface generously. Tip the dough out on the surface. Sprinkle 2-3 tablespoons flour on top of the dough and some extra on your hands and then start kneading. As you knead keep adding more flour. You may use the whole cup (I had 2 tablespoons left from mine). Knead the dough for at least 10 minutes. Do windowpane test (see tip no 4 at the end of article) to check if the dough is ready for rising.
Step 6:
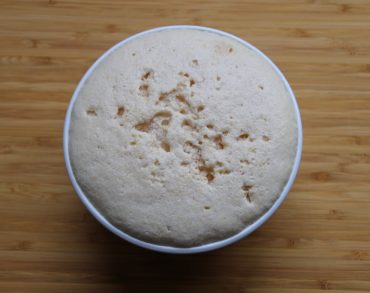
Grease a large bowl with butter and turn dough out into the bowl. Flip over dough so greased side is up, cover with plastic wrap or a kitchen towel and set in a warm, draft-free spot until doubled in size, about 1 1/2 to 2 hours. Generously butter two loaf pans.
Step 7:

When the dough has doubled in size, punch out the air and divide into 2 balls. Put the ball on a floured surface and knead for 3 minutes to make a smooth ball.
Step 8:
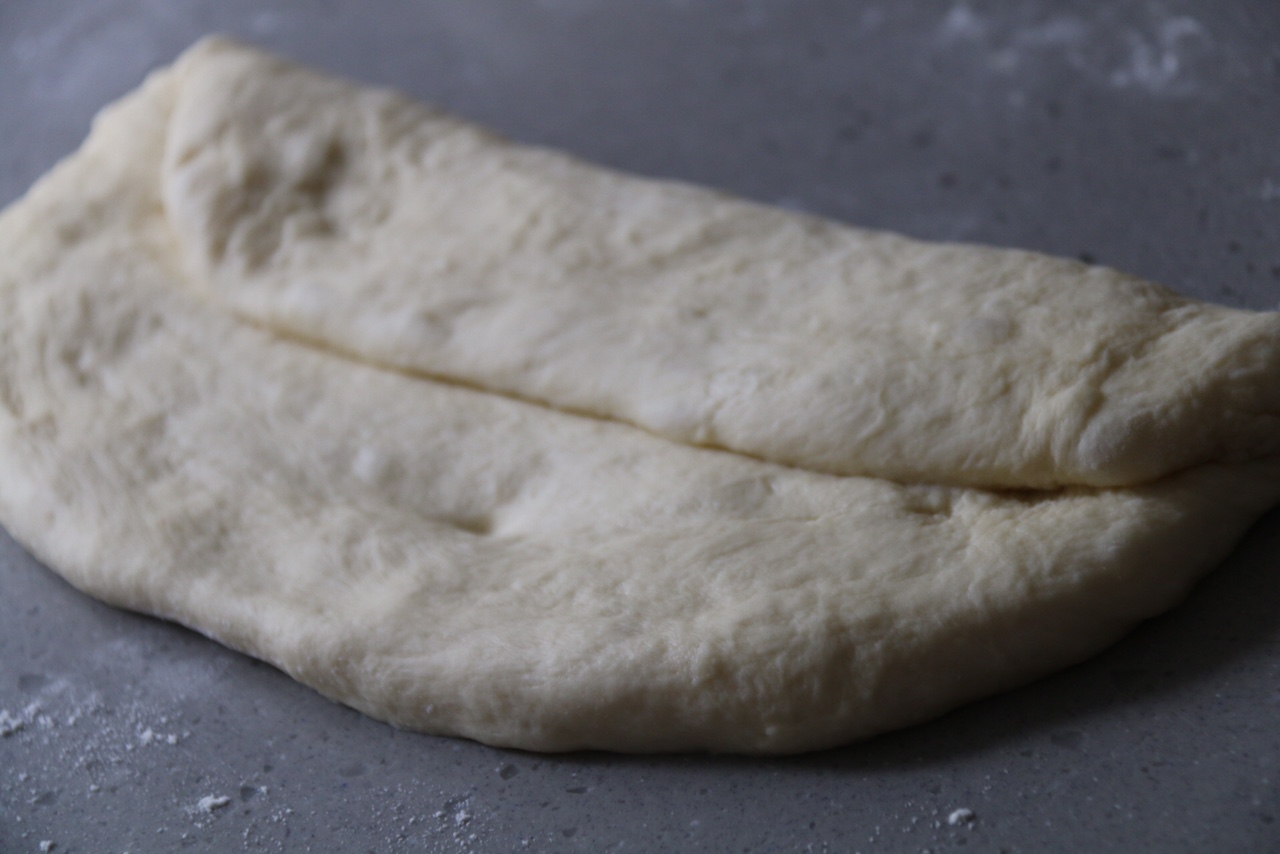
Shape dough ball into a rectangle (about 1/2 inch thick with length same size as your bread pan. Then fold sides of dough into the middle; overlapping slightly. Press seam to seal. Transfer dough, seam side down, to the pan. Repeat with remaining dough. Brush tops of loaves with remaining melted butter/ ghee. Sprinkle some sesame seeds.
Step 9:
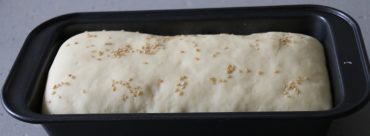
Cover and let the dough rise until it is just above the top of pans, 45 minutes to 1 hour.
Step 10:

As the dough is rising preheat the oven to 220C. Place the loaf pans in the center of the oven. Place water in an oven proof dish on the bottom rack. The steam will help give the bread a good crust. Bake bread for 10 minutes at 220C, then reduce the heat to 180C degrees and bake for an additional 20 to 30 minutes, or until loaves sound hollow when tapped, and the top of loaves are brown. Rotate the pans halfway through baking. Remove loaves from the pans and let cool on wire racks.
This bread will make delicious toast. Seriously, pop a slice in the toaster, get it golden brown, and spread a bit of butter or margarine on it. Truly, truly sublime.
Notes: Some Tips On Making Bread
Tip 1: Ideal temperature for liquid in bread.
When using milk/water in the recipe it should be warm which means one can comfortably dip one’s finger in it without burning it. If it’s too hot leave for it to cool down for 5 minutes as a too hot liquid can kill the yeast.
Tip 2: an Ideal amount of liquid in the dough.
The dough needs to be sticky. Add liquid slowly. The ingredients are written as estimates as the flour absorbs moisture from the air and sometimes it needs less liquid to make a dough. As the dough is kneaded it will become smooth and elastic. It will stop sticking to your hands but will still be very soft to touch and feel moist. If it feels hard or dry you have added too much flour. It’s ok to leave more liquid in the dough then to dry it out. If it has become dry, wet your hands and kneads with them, slowly add more water to the dough.
Tip 3: Correct way to knead the dough.
Kneading is to stretch the dough using the heel of your hand pushing the dough far out, then fold in half and give it a quarter turn and repeat again. Sprinkle flour on your hands and knead. If all the flour is incorporated then oil hands and knead.
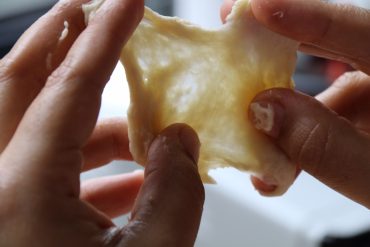
Tip 4: The Windowpane Test.

The “windowpane test” is one way of telling if the bread is kneaded sufficiently. Take a small piece of the dough about the size of a golf ball. Hold it between your thumb and first two fingers. Gently spread your fingers and thumbs apart, stretching the dough into a thin translucent membrane (ie, a windowpane), If you can stretch the dough without it breaking, that means the gluten in bread is well developed and your dough is ready to rise. If the dough tears before you’ve fully extended your fingers, the gluten isn’t quite ready yet. Knead the dough for another 2 minutes and try the windowpane test again.
Tip 5: How to tell the dough has risen properly
Let the dough stand in a warm place until it doubles in volume. To tell that dough has risen properly; pressed down on the dough, if it is ready it should not spring back when pressed. If it springs back to leave it for more time, another 10 minutes. In winters do this test after 2 hours of leaving the dough to rise. In the summers do it earlier.
Tip 6: How to tell that the bread is cooked.
First is a way to tell is the color of the loaf. The crust should be dry, firm, and a deep golden brown color with darker spots here and there. If the crust is still looking white, give it a few more minutes. Another way is to take the loaf out of the oven, take it out of loaf pan using a kitchen napkin or glove (be careful it’s hot) turn it upside down. Give the bottom of the loaf a tap with your knuckles. The bread will sound hollow if it’s done. If it’s not cooked it will sound dense. Give it another 5-6 minute in the oven and repeat. Bread loaf does take a minimum 30 minutes to cook so do test after 30 minutes.
Tip 7: If bread is browned too quickly.
This happens if the oven is too hot (which does happen quite often in home ovens). Bread will look a dark brown color and may even start to have black patches. Don’t panic take out bread from the oven, cover the top with aluminum foil. Lower the temperature in oven and bake. You may need to bake longer than recipe time which is ok.


Leave a reply